Pozo de agua - Wet well
- Maria

- 4 mar
- 4 Min. de lectura
Bue, “pozo de agua” totalmente traducido directo porque sino el tìtulo se hace muy largo…
Se me ocurrio que este cuento podìa ser màs interesante para “nuestros hombres lectores”!!, igual a mi me re impresionò.
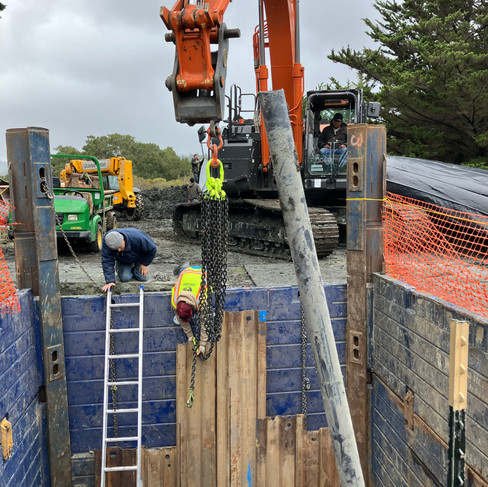
Ya habìa visto como Denis y empleados han hecho otro de estos pozos para bombas de agua pero lo distinto en este, es que no habìa espacio para cavar a lo ancho para llegar a la profundidad requerida sin que se derrumbe. Hoy, acà hay que ir para abajo ahì no màs, con lo que se tuvo que usar planchas de hierro para prevenir derrumbamiento.
El procedimiento es cavar unos metros en profundo y armar un cuadrado con postes y planchas de hierro. Se coloca la primera, se cava otra profundidad y se colocan las segundas planchas, una arriba de la otra hasta que se llega a la profundidad requerida.
Los chicos tienen que trabajar ahi adentro por eso las placas.
I thought to write a little about the wet well as it is a bit different to greens, bunkers and fairways!; thinking that could be more interesting to our male followers!, thou!, it did interested me a lot!
Denis and some crews already done a couple of wet well but never using steel planks. Due to the lack of room (space) in the allocated area for the well they had to use this system for their safety. When there is plenty of space, one can cut shelves to each side until reaching the necessary depth.
In this location they needed to go straight down; so they started excavating until a safe deepness, then, they started installing the planks all around having a nice square hole. Then, they can excavate again reaching the next stage, lowering the planks as they go until getting the desire depth.
En dos paredes opuestas, mirando el dique, como quièn dice…!, el ùltimo tramo, abajo del todo, se colocan unas planchas màs angostas que se pueden levantar individualmente, abriendo paso al taladro que, eventualmente, colocarà el caño de 24 pulgadas. Denis y uno de los empleados van midiendo para abrir solo hasta la altura necesaria; yo miro y saco fotos de lejos y me descompongo de vertigo de solo mirarlos... Me voy porque me ponen muy nerviosa!... ja! ja!
Esta màquina/taladro hace todo esto, desde lejos, “por adentro” de la tierra! De locos!!
On the 2 oposite walls, facing the dam, they installed thinner steel planks in the inside, at the bottom to be able to move up individually, to give room for the drill to cut through all the way to the dam. The drill works under ground! Crazy!!
I take pictures and watch but I feel sick to my stomach from vertigo..., I go and come back various times as I get to nerves from just watching... ha! ha!
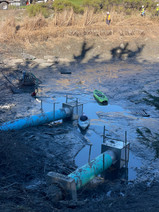
La idea es conectar el pozo de cilindros de cemento con el dique. Con la màquina que hace el agujero por debajo de la tierra; van utilizando diferentes tamaños de taladros, de menor a mayo, hasta llegar a la medida necesaria para que entre el tubo. La misma màquina, tironeando, lo trae desde el dique hasta el pozo!!
La pared hacia el dique se empezó a desmoronar asi que usaron un poco de cemento y tierra de afuera para volver a armarla, compactando al final.
The driller works its magic! Starting with a small drill went all the way to the dam; dug increasing the size of the drill until reaching the necessary hole for the 24 inches pipe. The same machine pulls the pipe from the dam into the well.
The dam’s wall started to give away so, using concrete and dry soil, they compacted and made it safe again!
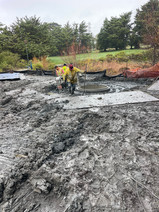
Muchos dìas de lluvia no ayudaron para nada en hacer el trabajo màs fácil ni placentero… pobres, un barrial que parecía un chiquero… Asquete total!
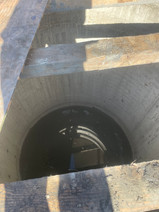
Luego, se colocan los anillos de cemento para formar el pozo de almacenamiento de agua; donde, tambièn, va el caño de la bomba.
Despuès de cada anillo instalado, se van sacando las placas de hierro, se rellena y compacta todo alrededor. Cada dìa, al terminar el trabajo, se tapa todo con plàstico por si llegara a llover y se asegura el lugar para evitar accidentes....
Asì, hasta llegar a nivel terreno; dejando todo muy prolijo para colocar el cemento donde irà la bomba y su casita! Esto lo hace otra empresa asì que no tengo fotos.
Super interesante ir viendo cada proceso!
At this time of the year, it is rainy season… Of course it rained!…, lots… the site looked like a pigs pitch! Horribly muddy… poor guys…
Installing the concrete rings for the well was quite interesting too! Each ring weighting “a tone”!!, needed to be installed to its right spot!, a bit of maneuver here and there and job was done! After each one, they’ll remove the planks to that level; they’ll fill up and compacted soil around them. Slowly but surely!, all the way to the top!
After each day, they’ll secure the site with plastic for possible rain and protection mesh just to stop any curious from falling in…
Once the concrete base for the pump and its house was poured, they left everything tidy us our job was done!
Descubrieron un caño del 1800 o antes!, toda esta zona, con diques proveían agua a San Francisco, con lo cual puede que caños viejos sigan enterrados.
Èste caño hecho de madera cortada a lo largo, en chanfle, para ir formando lo redondo!, atadas con alambre. Incredible! “El principio del caño!!”
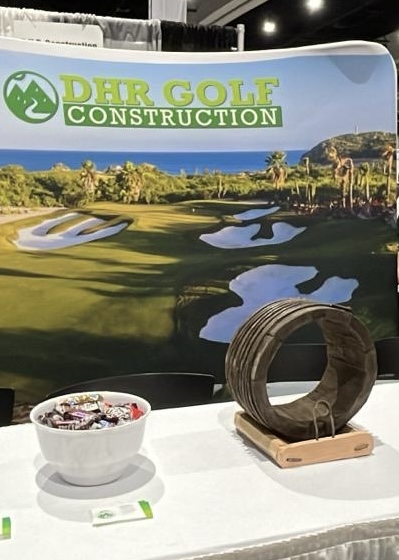
Denis se trajo un buen pedazo a casa, cortò un tramo, armo “arte” para regalarle a la cancha. El resto creo lo quiere llevar a un museo.
They discovered a pipe from the 1800! The surrounds of the golf course it used to be the water supply for San Francisco, so it should be lots of old pipes underground still!
This particular pipe, made of wood!, in long, thin planks secured together with wire, making a perfect round pipe! Amazing! “The beginning” of the pipe!
Denis cut a piece and made an “arty” thing to give to the golf course; the rest he wants to take ti to a museum.











Commenti